
As per usual I have a friend that needs a favor and this time it’s a Halloween sign.
I thought I’d share this one because it’s really easy and many people do get these template cut outs and want to do something a little different. This technique can change or be manipulated into hundreds of different looks, making it a user friendly, quick, effective finish for jobs of mass production.
So here we go…This is a pumpkin cut out piece, you can make one from MDF either by jig saw or CNC machine. This technique can be used on anything that can be painted, really. It’s a quick and easy paint finish to make on one or multiples if needed. All up this was completed in 20 minutes..
 Apply solvent based stain with a rag onto under coated surface.
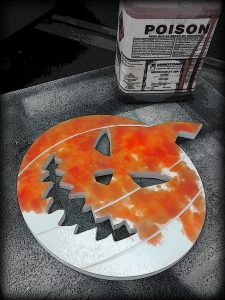
 Flick thinners onto stain. Here is the start, you can see the stain separating
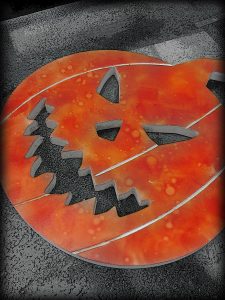
Here is the stain after multiple applications of stain
Essentially you are making a quick reaction to make a cool psychedelic, textured look on a flat surface. It is important to use white undercoat first so that the stain is bright. Because this is solvent based, use safety gloves.
You can use many things to flick the thinners: a brush, toothbrush, fingers etc… all work fine.
Do try and let the thinners dry in between flicking, it’s rather pointless to have put all that stain on to then have it wash off due to pouring too much thinners on at once 😉
Once you have the look you’re happy with, seal the deal with some clear paint. I used single pack furniture paint (air dry/nitrocellulose)
You can get an aerosol of this type of paint at most hardware stores, automotive stores or paint shops.
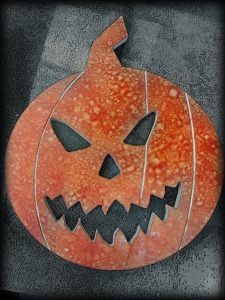
 Darken edges for contrast
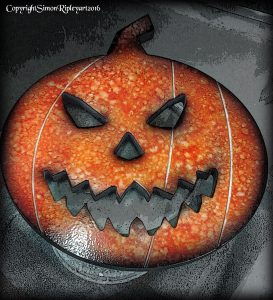
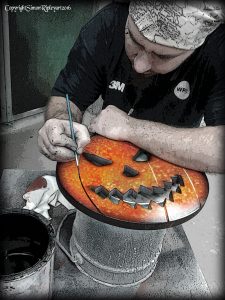 Fill in lines with black paint
 ready for hanging
So this is where the wow factor will come in, the final touches. With the darkening of the edges (or in painter’s language ‘the sunburst effect’) it’s a really simple method. Spray your paint (using whichever apparatus you have chosen – aerosol/spray gun, tooth brush) around the edge or off the edge of the piece you are working on. The amount of blending you want will be achieved by how much or how little spray you allow to get on the piece. If you don’t have any spray techniques available, you can get a similar effect by simply darkening edges with your brush and then using clear with some of the colour mixed in with it to shade the outer area.
If it’s an outdoor sign, you will need to apply a more durable exterior paint so that it survives the elements for more than one use. Do make sure the stains are well sealed before applying the heavier duty paint. Some exterior paints or 2 pack paints (paints with hardener) will eat into the stain and ruin your hard earned textured look. Also a nice touch is to spray a really light coat of metallic over the piece so that when the sun hits it, it sparkles. In this case, a gold metallic to blend with the orange.
There you have it, 20 minutes and you could have one (or ten!) great Halloween signs ready to let lil’ kiddies know where the candy is!
Sweet!
One Response
Monique Powell
Awesomeness